 Save Pin
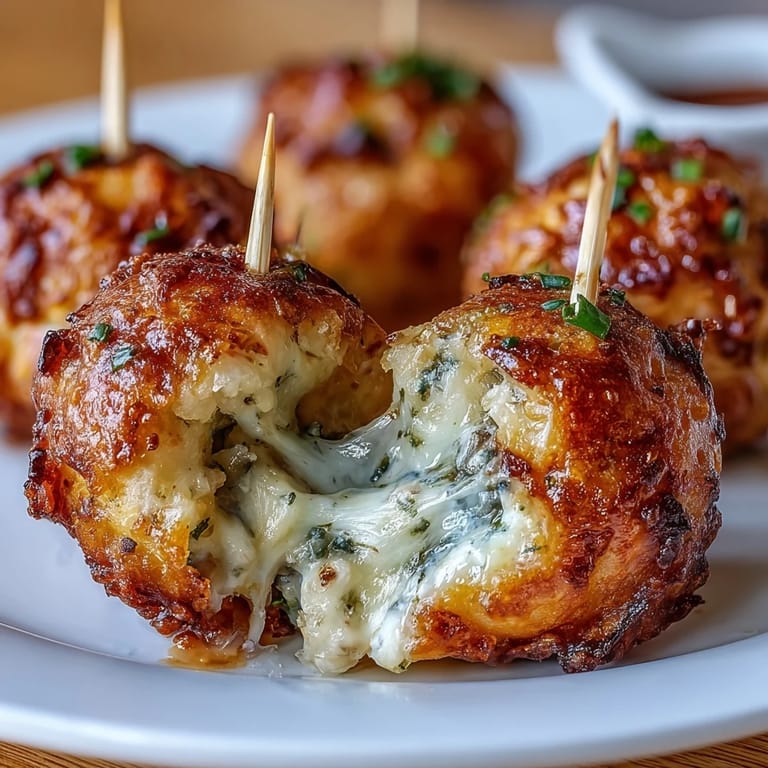
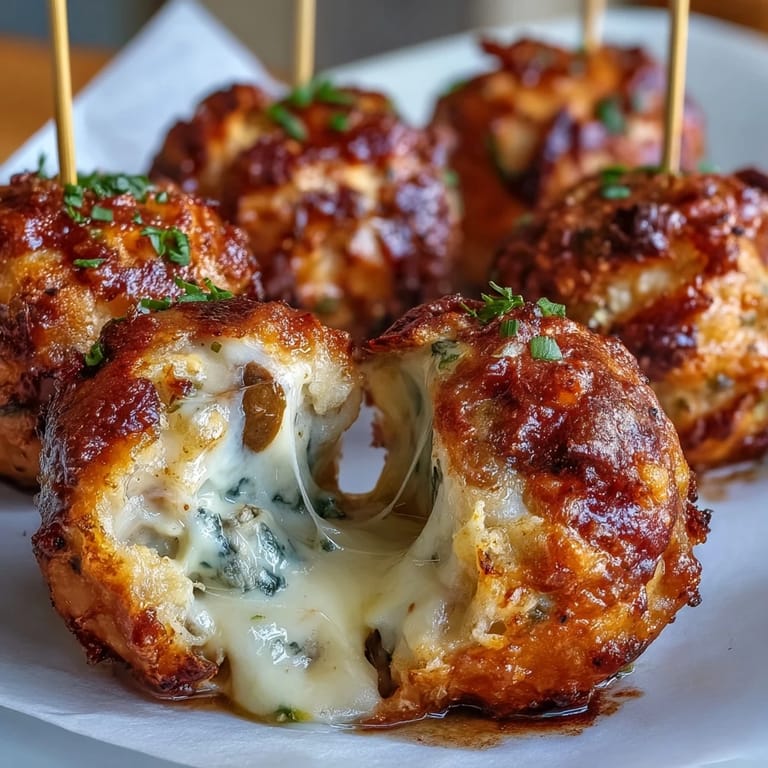
 The clatter of skewers hitting the countertop is usually a sign that something especially fun is about to happen in my kitchen. These Derby Party Olive Cheese Balls came about when I wanted a savory snack that was somehow celebratory—not the usual cheese platter but still full of cheese, just with a little more flair. Watching the dough come together, rich and flecked with smoked paprika, always makes me think of warm evenings when friends are expected and the music is up. I can’t help but taste-test one or two before setting them on the platter, partly to check the cheese-to-olive ratio, but mostly because the anticipation is irresistible. Hot from the oven, their scent is immediately inviting and a little bit indulgent.
One spring afternoon, with my hands still dusted with flour, I assembled a tray of these for a last-minute game night; halfway through, someone declared them better than any store-bought snack they'd ever had. It’s a recipe made for moments when you want something that feels playful but homemade—best enjoyed when the crowd is a little loud and laughter keeps bubbling up around the table.
Ingredients
- All-purpose flour: Lends the dough structure and just the right amount of tenderness—sift it if you want a fluffier texture.
- Sharp cheddar cheese, shredded: Use a block and shred it yourself for maximum meltiness and savory depth; the sharper, the better.
- Unsalted butter, softened: Soften it ahead of time for easy blending and rich flavor; cold butter won't bind as well.
- Cayenne pepper (optional): Adds gentle heat that doesn't overpower—the secret for when you want people to wonder what makes these balls so addictive.
- Smoked paprika: A pinch brings warm smokiness and that extra touch of color.
- Salt: Balances the butteriness and cheese; always taste the cheese first to decide if you want the full amount.
- Large green olives, pitted: Spanish Manzanilla work best but don’t be afraid to try stuffed or black olives for a twist.
- Appetizer-sized skewers or toothpicks: Makes grabbing, serving, and eating with one hand delightfully easy—plus, they look festive on a tray.
Tired of Takeout? 🥡
Get 10 meals you can make faster than delivery arrives. Seriously.
One email. No spam. Unsubscribe anytime.
Instructions
- Get your oven ready:
- Preheat it to 400°F (200°C) and line a baking sheet with parchment paper, so nothing sticks and cleanup is a breeze.
- Mix up the cheesy dough:
- Combine flour, cheddar, butter, cayenne, smoked paprika, and salt in a bowl—use your hands, pressing and folding until a soft dough comes together.
- Divide and prep the dough:
- Pat it into a rectangle and cut into 24 even hunks (about a tablespoon each); don’t worry if they’re not perfectly identical.
- Wrap the olives:
- Flatten a dough piece in your palm, nestle a green olive in the center, and close it up—roll between your hands until smooth and fully sealed.
- Get ready to bake:
- Set the cheese balls seam-side down on your baking sheet, giving them a little space—chill briefly if you want especially tidy results.
- Bake until golden:
- Slide into the oven for 16 to 18 minutes; when the tops are golden and your kitchen smells irresistible, they’re ready.
- Skewer and serve:
- Let them cool just enough to handle, then run a toothpick or skewer through each ball—serve warm or at room temperature, but definitely while people are nearby.
 Save Pin
  Save Pin
 The night I saw these disappear faster than anything else at my friend's birthday, I realized they’d become more than just a snack—they turned a gathering into a little celebration, one warm cheese bite at a time.
Turning Up the Flavor
If you want to add extra zing, I’ve found that a dash of hot sauce stirred into the dough does wonders—it’s subtle, but adds a lovely tickle of heat after that first buttery bite.
Choices for Olives and Cheeses
Sometimes I switch in jalapeño-stuffed olives for an unexpected kick, or even swap sharp cheddar for a smoked gouda; don’t be afraid to mix and match to fit your crowd or your cravings.
Serving and Storing
A bowl of grainy mustard or a small dish of bourbon honey dip on the side brings out the salty, sharp notes and makes these feel restaurant fancy, even on a weeknight.
- Let leftovers cool completely before stashing in an airtight container.
- To reheat, pop them in a hot oven for a few minutes till the cheese is melty again.
- These cheese balls taste just as good at room temperature if you’re pressed for time or fridge space.
 Save Pin
  Save Pin
 Whether for Derby season or just a happy excuse to gather friends, these little cheese balls are guaranteed to spark smiles. Here’s to snacks that make the moment, every time.
Questions & Answers
- → Can I make these ahead of time?
Yes. Prepare and assemble the balls, then refrigerate on a lined tray for up to 24 hours before baking. You can also freeze unbaked balls on a tray, transfer to a freezer bag, and bake from frozen with a few extra minutes.
- → How should I reheat leftovers?
Reheat in a 350°F (175°C) oven for 8–10 minutes until warmed through and crisp. Avoid microwaving to prevent sogginess; the oven restores a nice golden exterior.
- → What olives work best?
Pitted green olives like Spanish Manzanilla give a bright, salty contrast to the cheddar. Jalapeño-stuffed or black olives are fine substitutes for different flavors and heat levels.
- → Any tips for sealing and shaping?
Flatten dough pieces thinly and place the olive in the center, pulling the edges up and pinching tightly to seal. Roll gently between palms for a smooth surface and chill 10 minutes for neater shapes before baking.
- → Can I change the seasoning?
Yes. Add a pinch of cayenne or a dash of hot sauce for heat, swap smoked paprika for regular paprika, or fold in chopped herbs for a fresher note.
- → What dips pair well with these bites?
Grainy mustard, a bourbon-honey dip, or a tangy aioli complement the sharp cheddar and briny olive. Offer one or two contrasting dips for variety.