 Save Pin
 My neighbor brought a pan of these to a block party last summer, and I watched a dozen adults hover over the table like kids at a carnival. The chocolate was still slightly soft from the heat, and the sprinkles caught the sunlight. I grabbed one, took a bite, and immediately asked for the recipe. She laughed and said it was just Rice Krispies with a fancy jacket.
I made my first batch for my daughter's birthday, thinking they would be a fun addition to the dessert table. They disappeared faster than the cake. Kids lined up with sticky fingers asking if there were more hidden somewhere. Even my picky eater nephew, who usually only touches plain cookies, ate three bars and tucked one in his jacket pocket for later.
Ingredients
- Unsalted butter: I always use unsalted so I can control the salt level, and it keeps the marshmallow mixture from tasting too savory.
- Mini marshmallows: They melt faster and more evenly than the large ones, which means less stirring and a smoother base.
- Rice Krispies cereal: The star of the show, light and crispy, it holds the marshmallow beautifully without getting soggy.
- Fine sea salt: Just a pinch balances the sweetness and makes the chocolate topping taste richer.
- Semisweet or dark chocolate chips: I prefer semisweet because it is not too bitter, but dark chocolate lovers can go bolder.
- Vegetable oil or coconut oil: This tiny addition makes the chocolate glossy and easier to spread without any streaks.
- Rainbow sprinkles or chopped nuts: Totally optional, but they turn plain bars into something that belongs on a party platter.
Tired of Takeout? 🥡
Get 10 meals you can make faster than delivery arrives. Seriously.
One email. No spam. Unsubscribe anytime.
Instructions
- Prep your pan:
- Grease that 8x8 or 9x9 pan generously with butter, or line it with parchment for easy lifting later. A well-greased pan is the difference between bars that pop out cleanly and a sticky wrestling match.
- Melt the butter:
- Set your saucepan over low heat and melt the butter slowly, stirring so it does not brown. Browned butter tastes great in some recipes, but here you want it pure and mild.
- Add the marshmallows:
- Toss in the mini marshmallows and keep stirring until they are completely melted and the mixture is smooth and stretchy. If you see any lumps, just keep stirring over low heat.
- Season and mix:
- Pull the pan off the heat and stir in the sea salt if you are using it. Then add the Rice Krispies and fold gently with a spatula until every piece is coated in that gooey marshmallow cloud.
- Press into the pan:
- Scrape the mixture into your prepared pan and press it down evenly using a buttered spatula or your hands. Press firmly but do not crush the cereal or you will lose that signature crunch.
- Let it rest:
- Give the base about 10 minutes to cool and firm up at room temperature. This makes it easier to spread chocolate on top without tearing the surface.
- Melt the chocolate:
- Combine chocolate chips and oil in a microwave-safe bowl, then heat in 30-second bursts, stirring after each one. Stop as soon as it is smooth and glossy to avoid scorching.
- Pour and spread:
- Pour the melted chocolate over the cooled base and use an offset spatula or the back of a spoon to spread it into an even layer. Work quickly before the chocolate starts to set.
- Add the garnish:
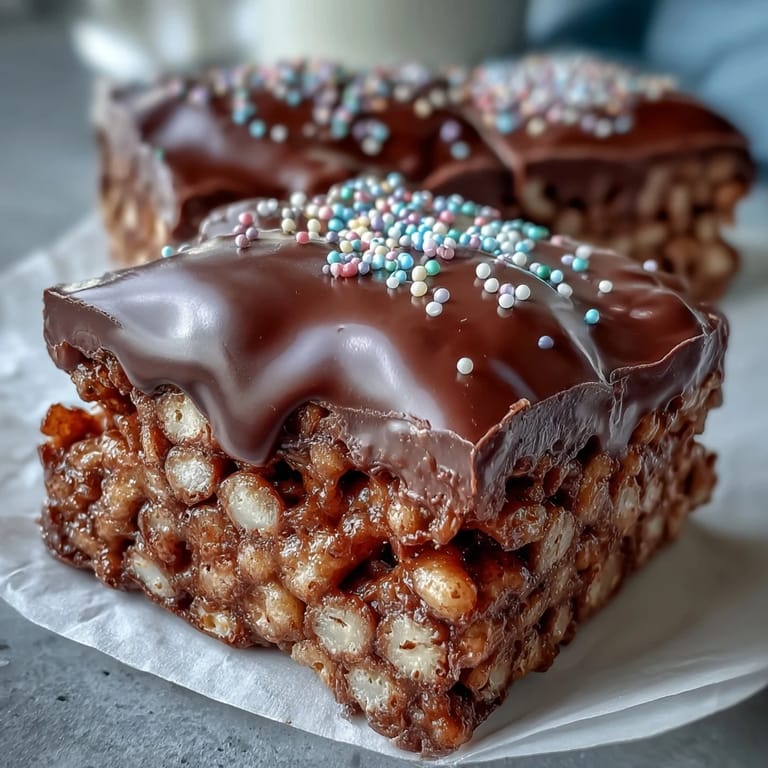
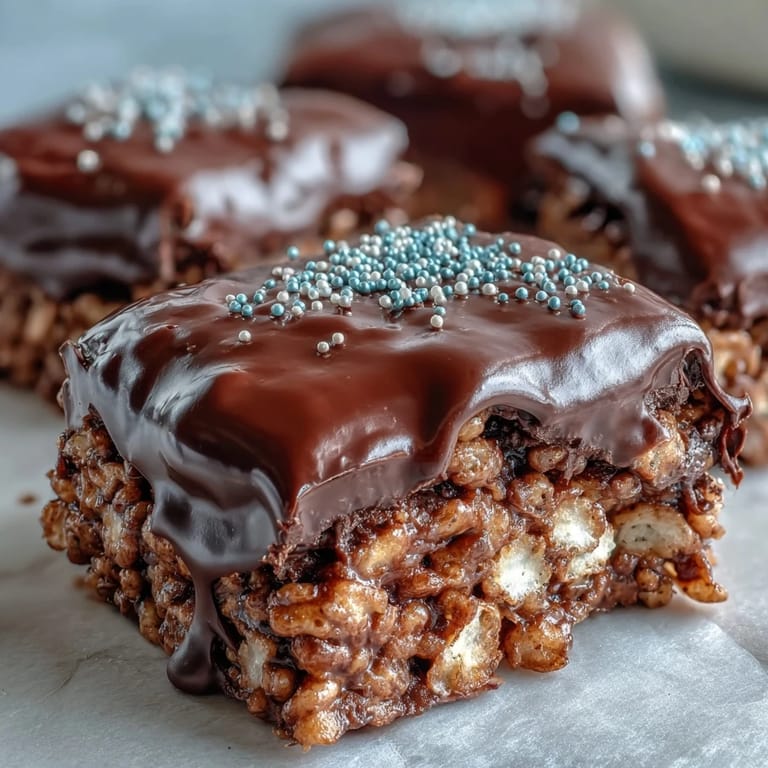
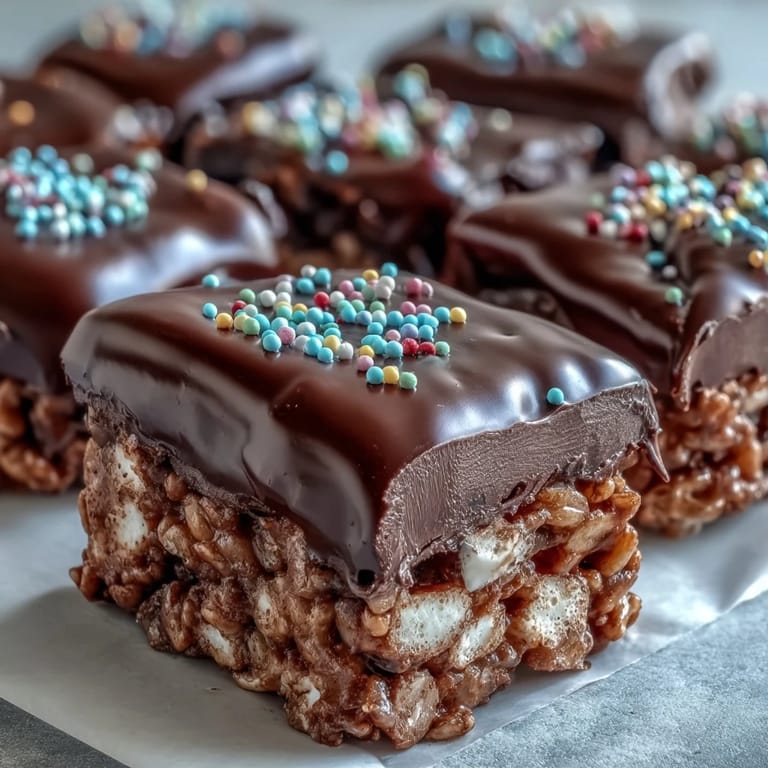
- Sprinkle on your rainbow sprinkles or chopped nuts right away while the chocolate is still wet. They will stick beautifully and add color and texture.
- Set the chocolate:
- Let the whole pan sit at room temperature for at least an hour, or pop it in the fridge for 20 to 30 minutes if you are in a hurry. The chocolate should be firm to the touch before you cut.
- Cut into bars:
- Lift the block out using the parchment overhang or flip it onto a cutting board, then use a sharp knife to cut into 12 to 16 bars. Wipe the knife between cuts for clean edges.
 Save Pin
 One afternoon my son and I made these together, and he insisted on arranging the sprinkles in a pattern. It took him fifteen minutes and the chocolate started to set halfway through, but he was so proud of his rainbow stripes. When his friends came over later, he pointed to the bars and said he decorated them himself. That little moment of pride made the whole messy kitchen worth it.
Storing and Keeping Them Fresh
I keep mine in an airtight container at room temperature, and they stay perfect for up to three days. If your kitchen is warm or you want them to last longer, the fridge works great and keeps the chocolate firm. Just let them sit out for a few minutes before serving so the chocolate is not rock hard. I have also frozen them for up to a month, stacking them between parchment sheets, and they thaw beautifully in about 20 minutes.
Flavor Twists and Variations
Once you master the basic recipe, you can play around endlessly. I have stirred peanut butter into the marshmallow mixture for a nutty twist, swapped the chocolate for white chocolate and added dried cranberries, and even mixed in a handful of mini chocolate chips before pressing. A friend of mine drizzles melted peanut butter over the chocolate layer and swirls it with a toothpick for a marbled look. The base recipe is so forgiving that almost any add-in or topping works.
Troubleshooting Common Issues
If your bars turn out too hard, you probably pressed them too firmly or used too much heat when melting the marshmallows. If the chocolate cracks when you cut, it means it set too cold, so let it warm up a bit before slicing. Sometimes the cereal is not evenly coated, and that usually means you did not stir long enough after adding it to the marshmallow mixture.
- Grease your hands lightly with butter when pressing the mixture to avoid sticking.
- Use a pizza cutter for super clean, even cuts once the chocolate is set.
- If the chocolate seizes and gets grainy, a tiny splash of warm cream can bring it back to smooth.
 Save Pin
 These treats have become my go-to whenever I need something quick, crowd-pleasing, and just a little bit special. They remind me that sometimes the simplest recipes, dressed up with a little chocolate and sprinkles, are the ones people remember most.
Questions & Answers
- → Can I use regular marshmallows instead of mini marshmallows?
Yes, you can substitute regular marshmallows for mini marshmallows. Use about 4 cups of regular marshmallows, which equals one 10-ounce package of minis. They may take slightly longer to melt completely.
- → How do I prevent the treats from sticking to the pan?
Grease your pan thoroughly with butter before adding the mixture. You can also line the pan with parchment paper, leaving overhang on the sides for easy removal once the treats have set.
- → What type of chocolate works best for the topping?
Semisweet or dark chocolate chips work beautifully. For a sweeter option, try milk chocolate. Adding a teaspoon of vegetable or coconut oil helps create a smooth, glossy finish that sets nicely.
- → How should I store these treats to keep them fresh?
Store in an airtight container at room temperature for up to 3 days, or refrigerate for up to one week. Layer parchment paper between stacks to prevent sticking. They can also be frozen for up to 2 months.
- → Why did my chocolate coating crack when I cut the bars?
The chocolate may have been too cold or set too quickly. Let refrigerated treats sit at room temperature for 5-10 minutes before cutting. Use a sharp knife warmed under hot water and dried between cuts for clean slices.
- → Can I make these treats gluten-free?
Yes, substitute regular Rice Krispies with a certified gluten-free crispy rice cereal. Always verify that your marshmallows and chocolate chips are also labeled gluten-free to ensure the entire treat meets dietary requirements.